the microdox bud / keyboard build
I spent the last week or so on a project that ended up being much more complex than expected, but it is now (mostly) working.
I’ve used a 40% ortholinear keyboard since early 2018. I was curious about ortholinear layouts because they were supposed to be more ergonomic, but I was also intrigued by the neat aesthetic, small size, and customizability of those boards. I had a Niu Mini for a bit, which I hauled all over Europe and Canada and loved using. However, due to its heft, I ended up selling it for a Planck EZ in 2019. I really enjoyed the Planck, eventually swapping out the Kailh Box Brown switches for Box Whites as I was seeking something more tactile. I loved using the Planck, but found it a bit fatiguing to have my hands so close together as I began typing more and more for work. I started noticing occasional wrist and shoulder pain, and began exploring options to make my work setup a little more ergonomic. The Herman Miller chair helped a lot, but I thought a split keyboard would help keep my arms further apart and my posture more upright.
A split keyboard sounded cool, but aesthetically, I didn’t really want to have multiple cables running all over my desk and around my trackpad. I also probably subconsciously wanted to make this project as difficult as possible for myself. After doing some research, I found the Nice! Nano v2 controllers that are Bluetooth enabled. This meant that I could hypothetically build a split keyboard that was fully wireless. That sounded super exciting, since wireless mechanical keyboards are uncommon, let alone split wireless mechanicals. I started looking around at different kits, like the Lily 58, the Corne, Gergoplex, and other split ergo boards. While looking around, I found the Microdox Bud kit, which was a 30% board with an aluminum case. 30% sounded a little crazy, but when I actually started mapping out the keys I used most, it began to feel more feasible. It also meant less soldering, which was definitely a win in my eyes. I ordered a kit, dusted off my soldering iron, and jumped keep into different guides and Discord servers to see how to make it all come together.

Trying to draw out different keymaps before attempting to code them up using ZMK.
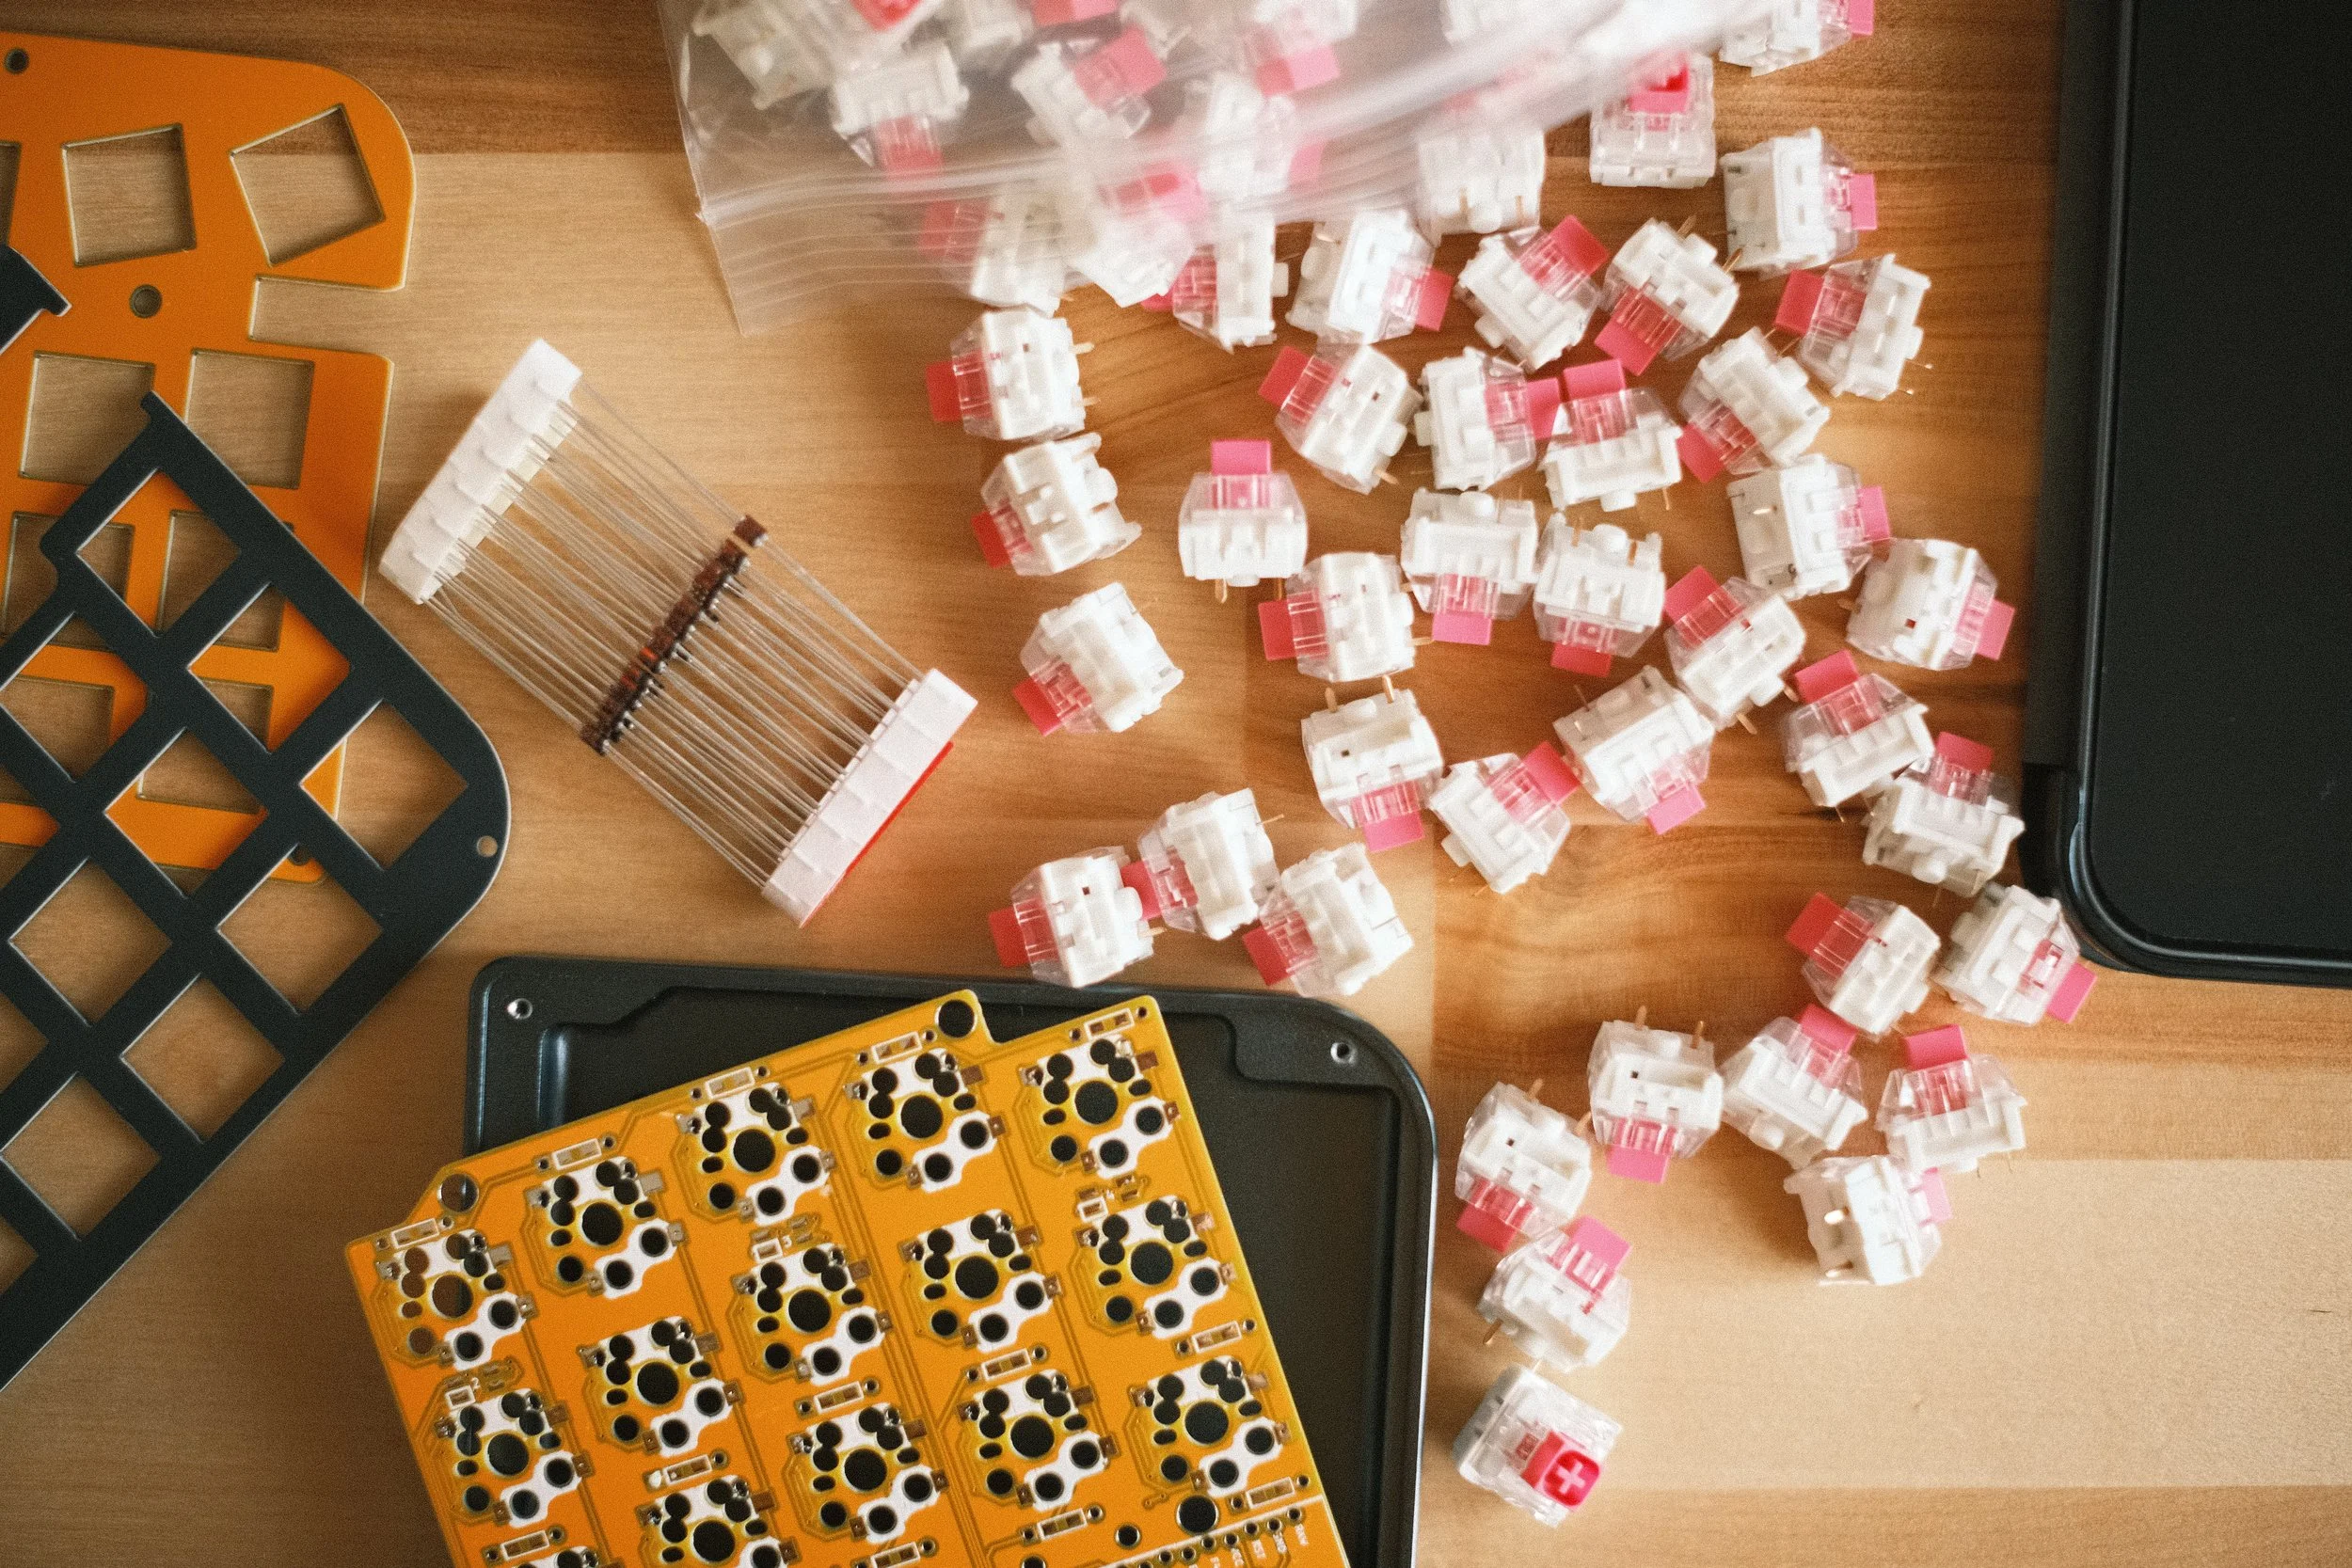
Different kit parts all ready — diodes, PCB, plates, switches, case.
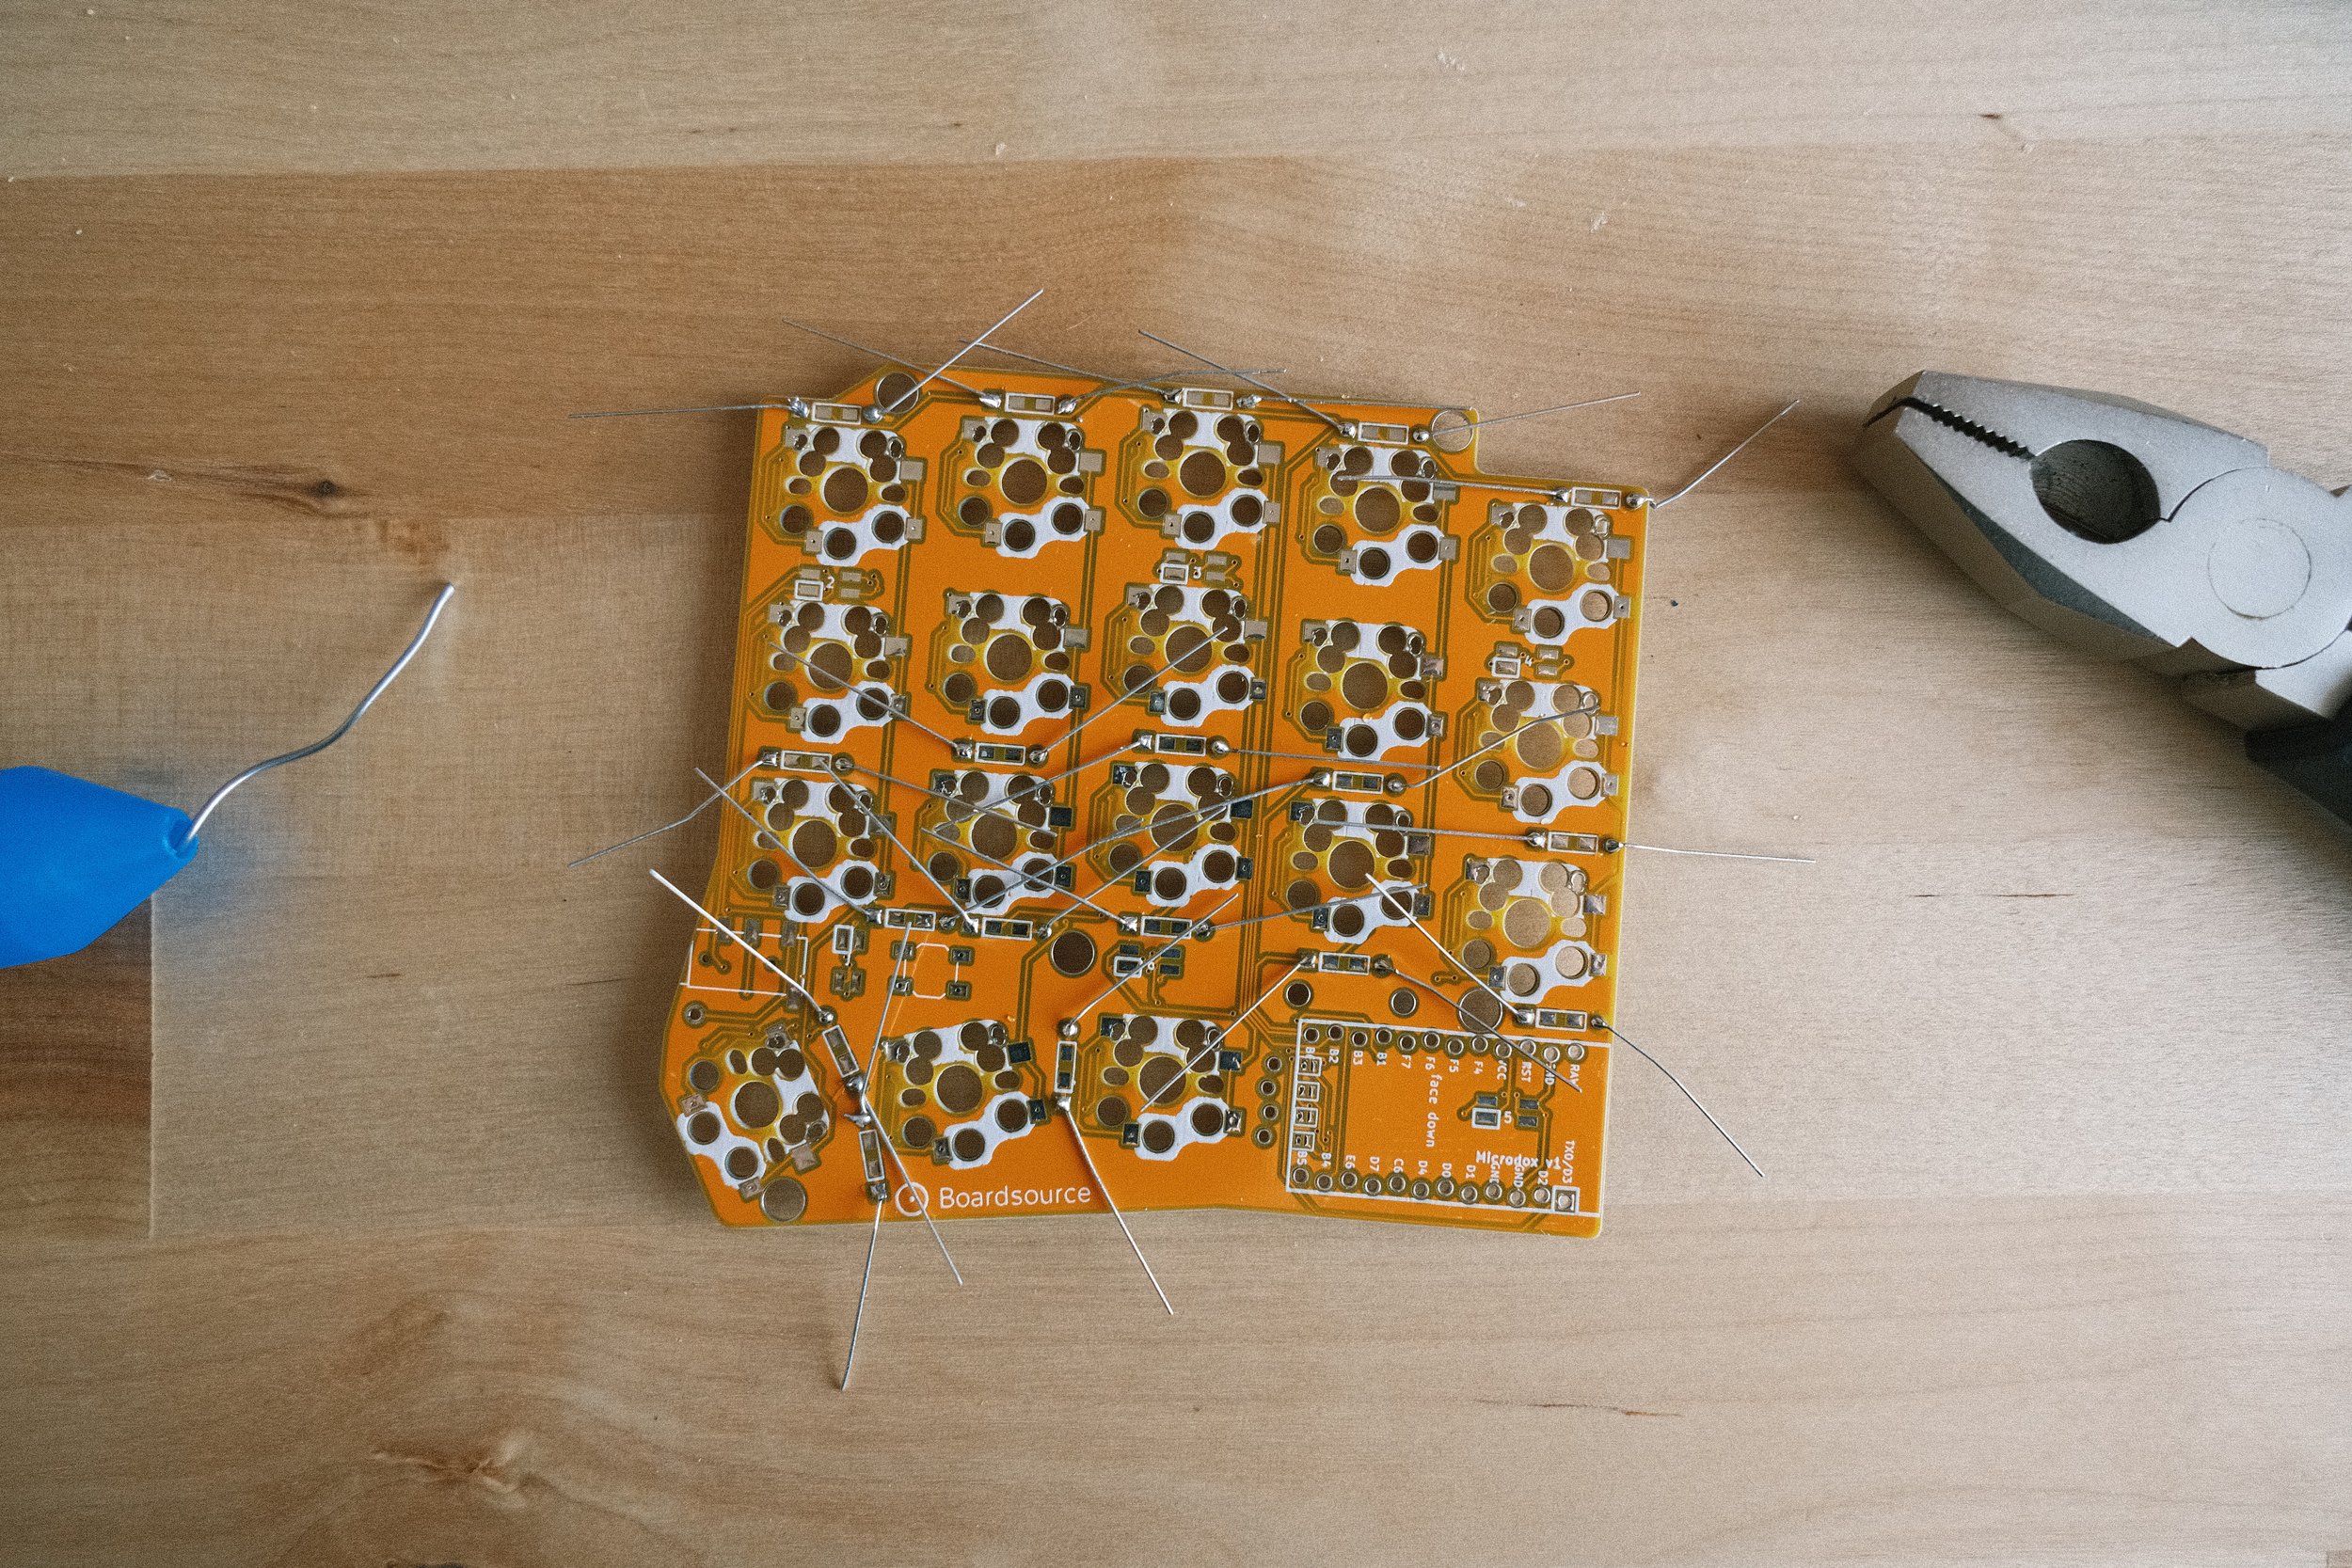
The through-hole diodes were pretty easy to solder. I realized at this point that I didn’t have a flush wire cutters so had to get those.
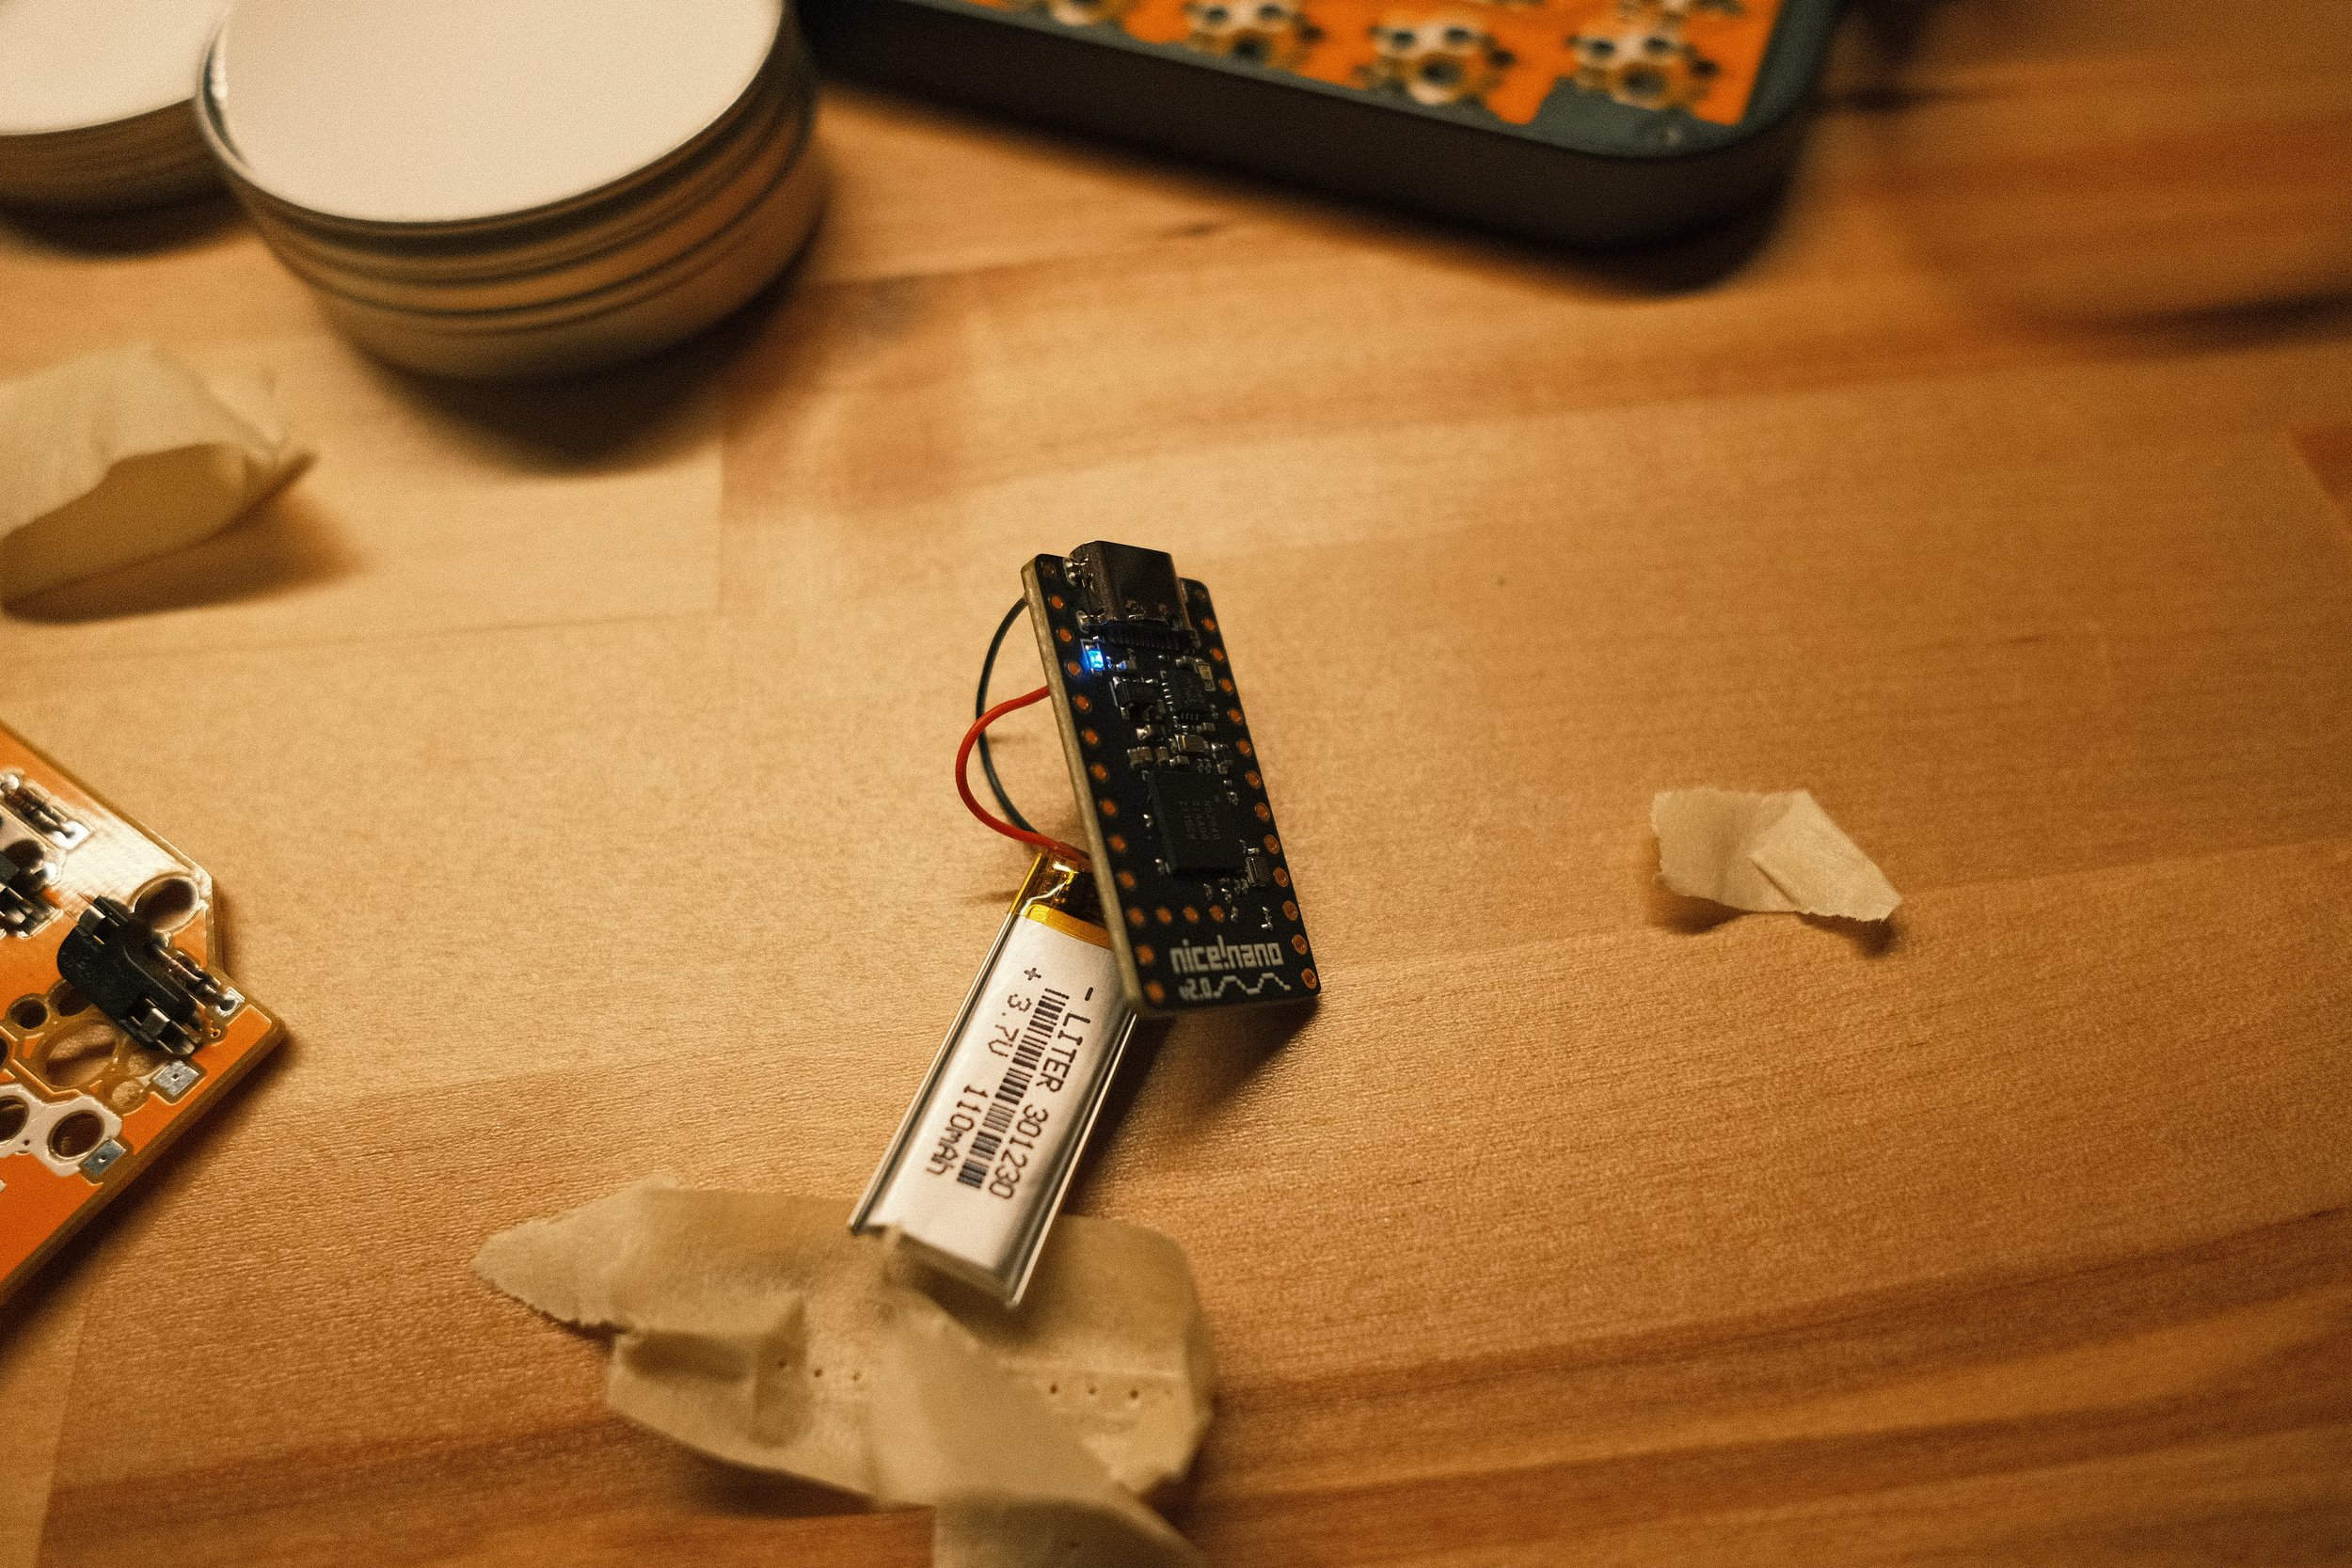
Getting the battery connected to the microcontroller was a bit of a struggle. Both of the parts are super small, and getting them well-soldered involved lots of precision. The battery is supposed to last about a week with normal use, which seems reasonable.
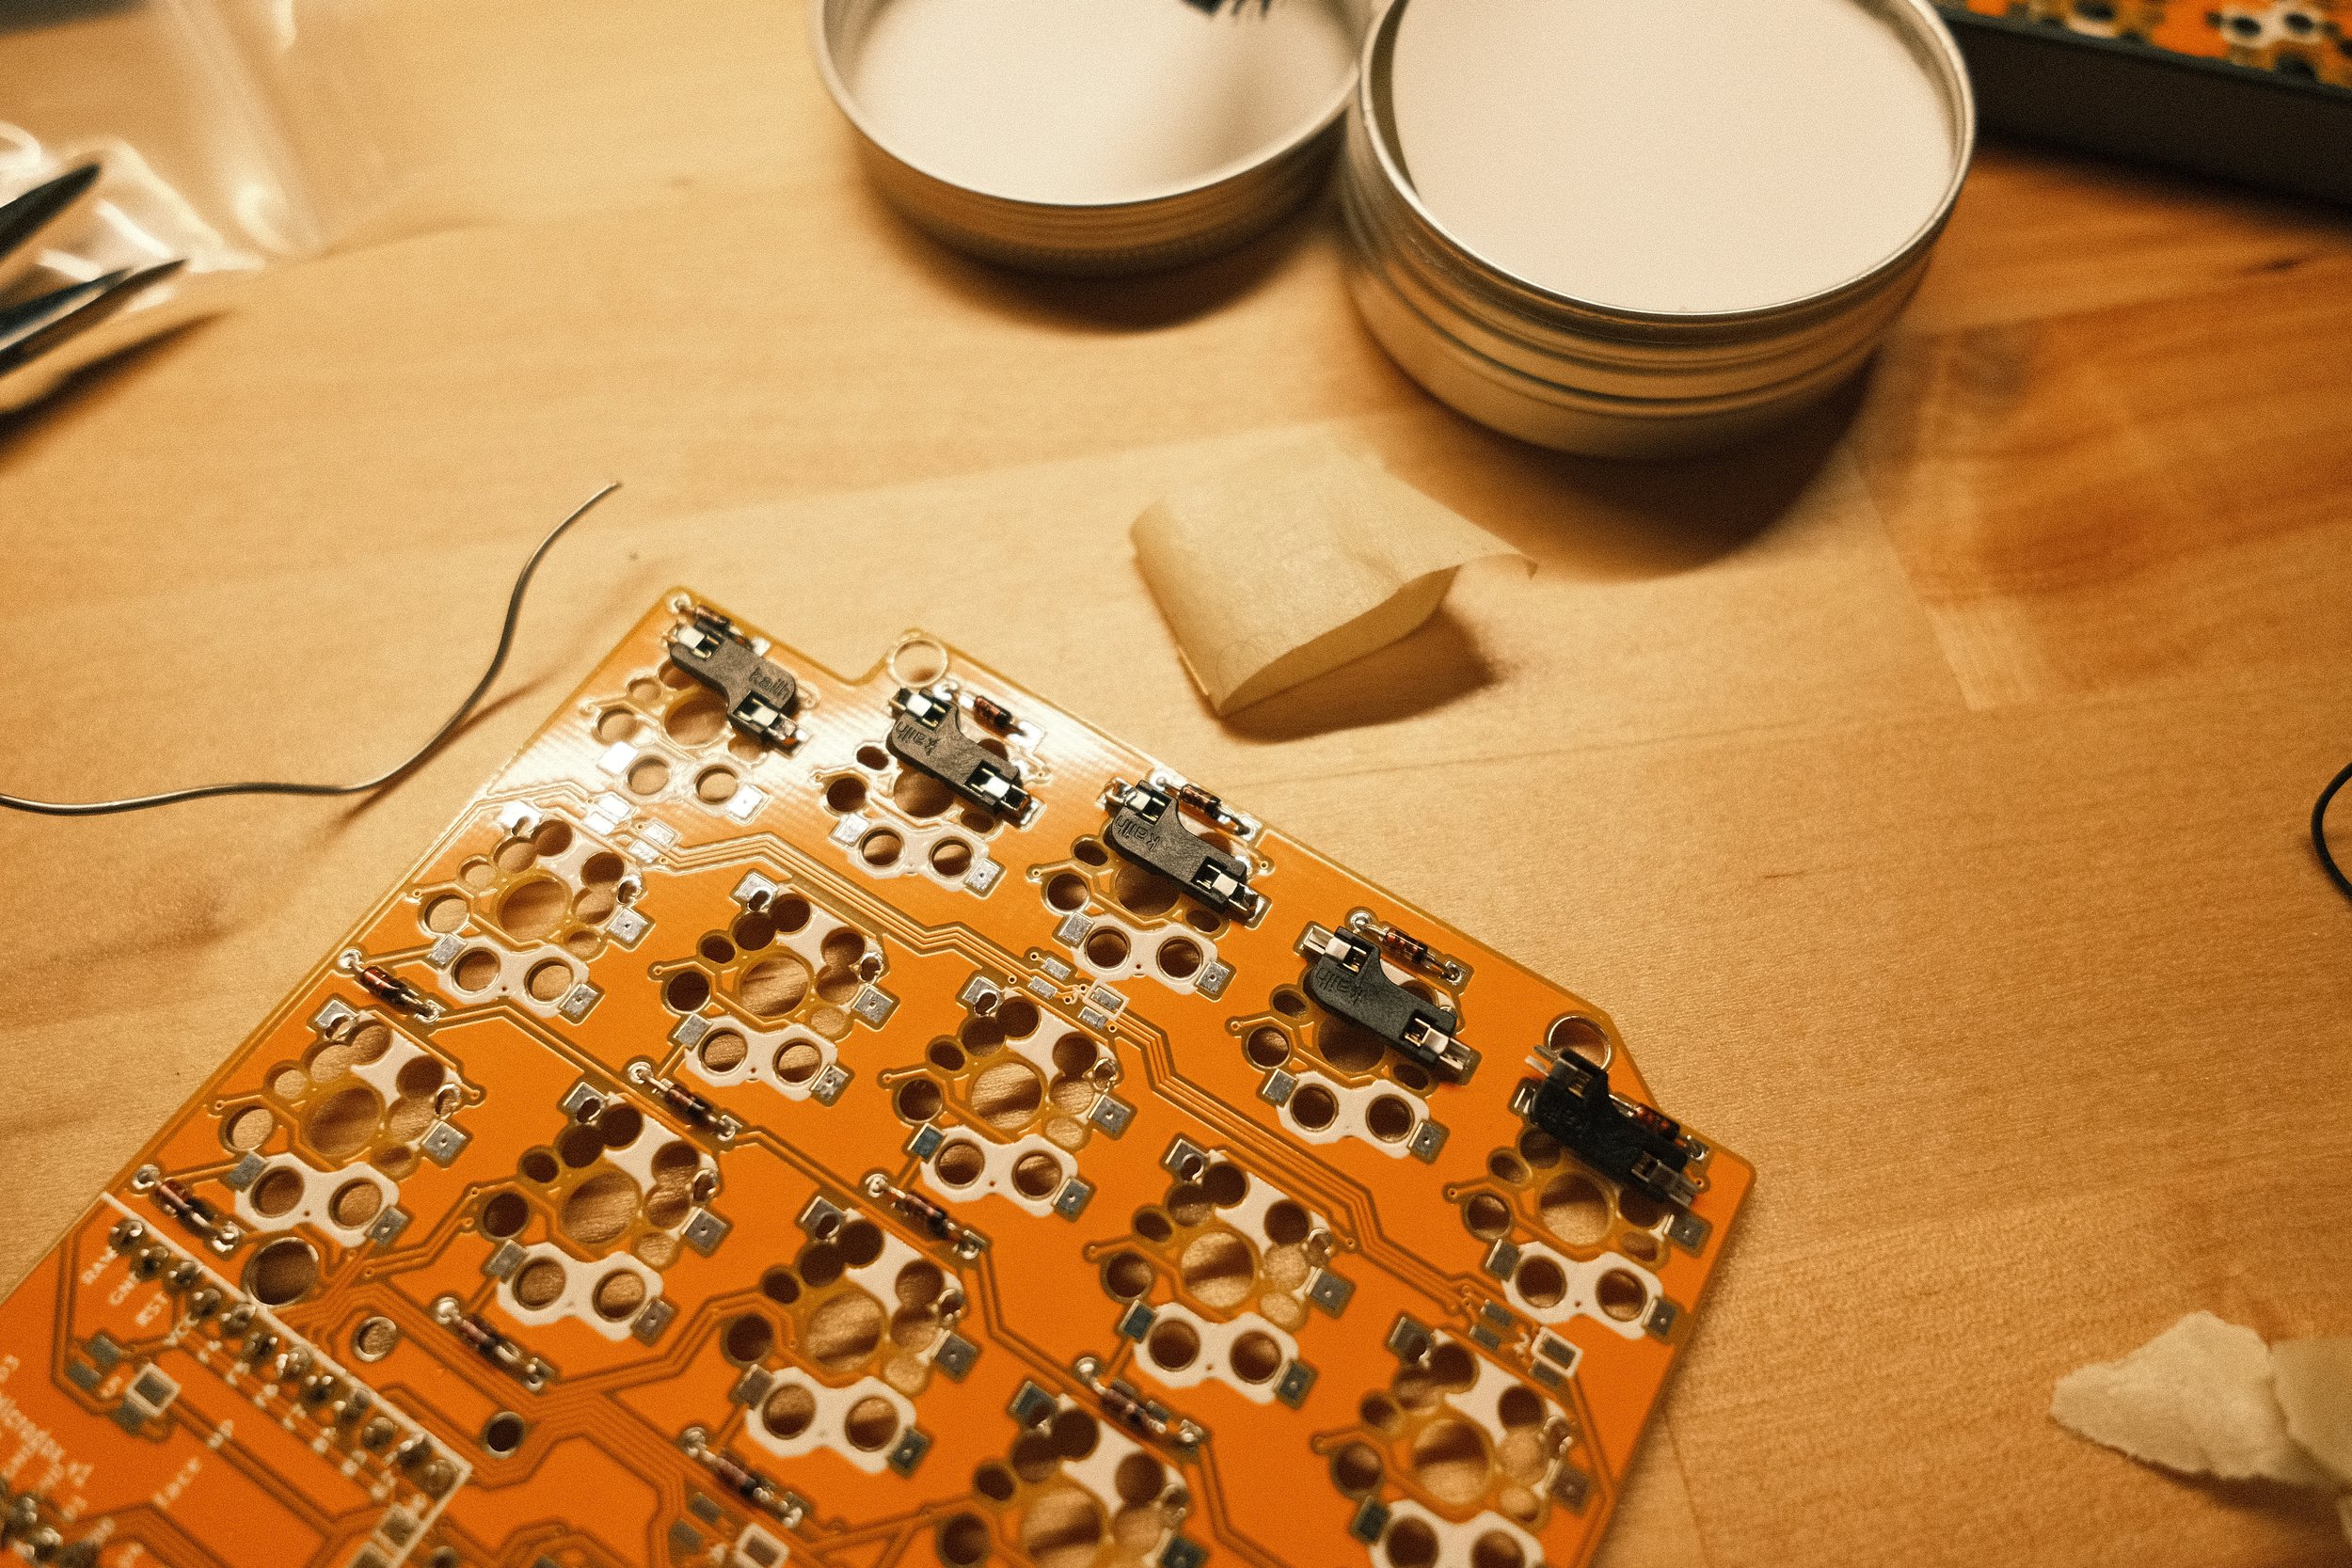
Hot-swap sockets allow you to change out switches easily, but also required lots of precision soldering to get a solid connection.
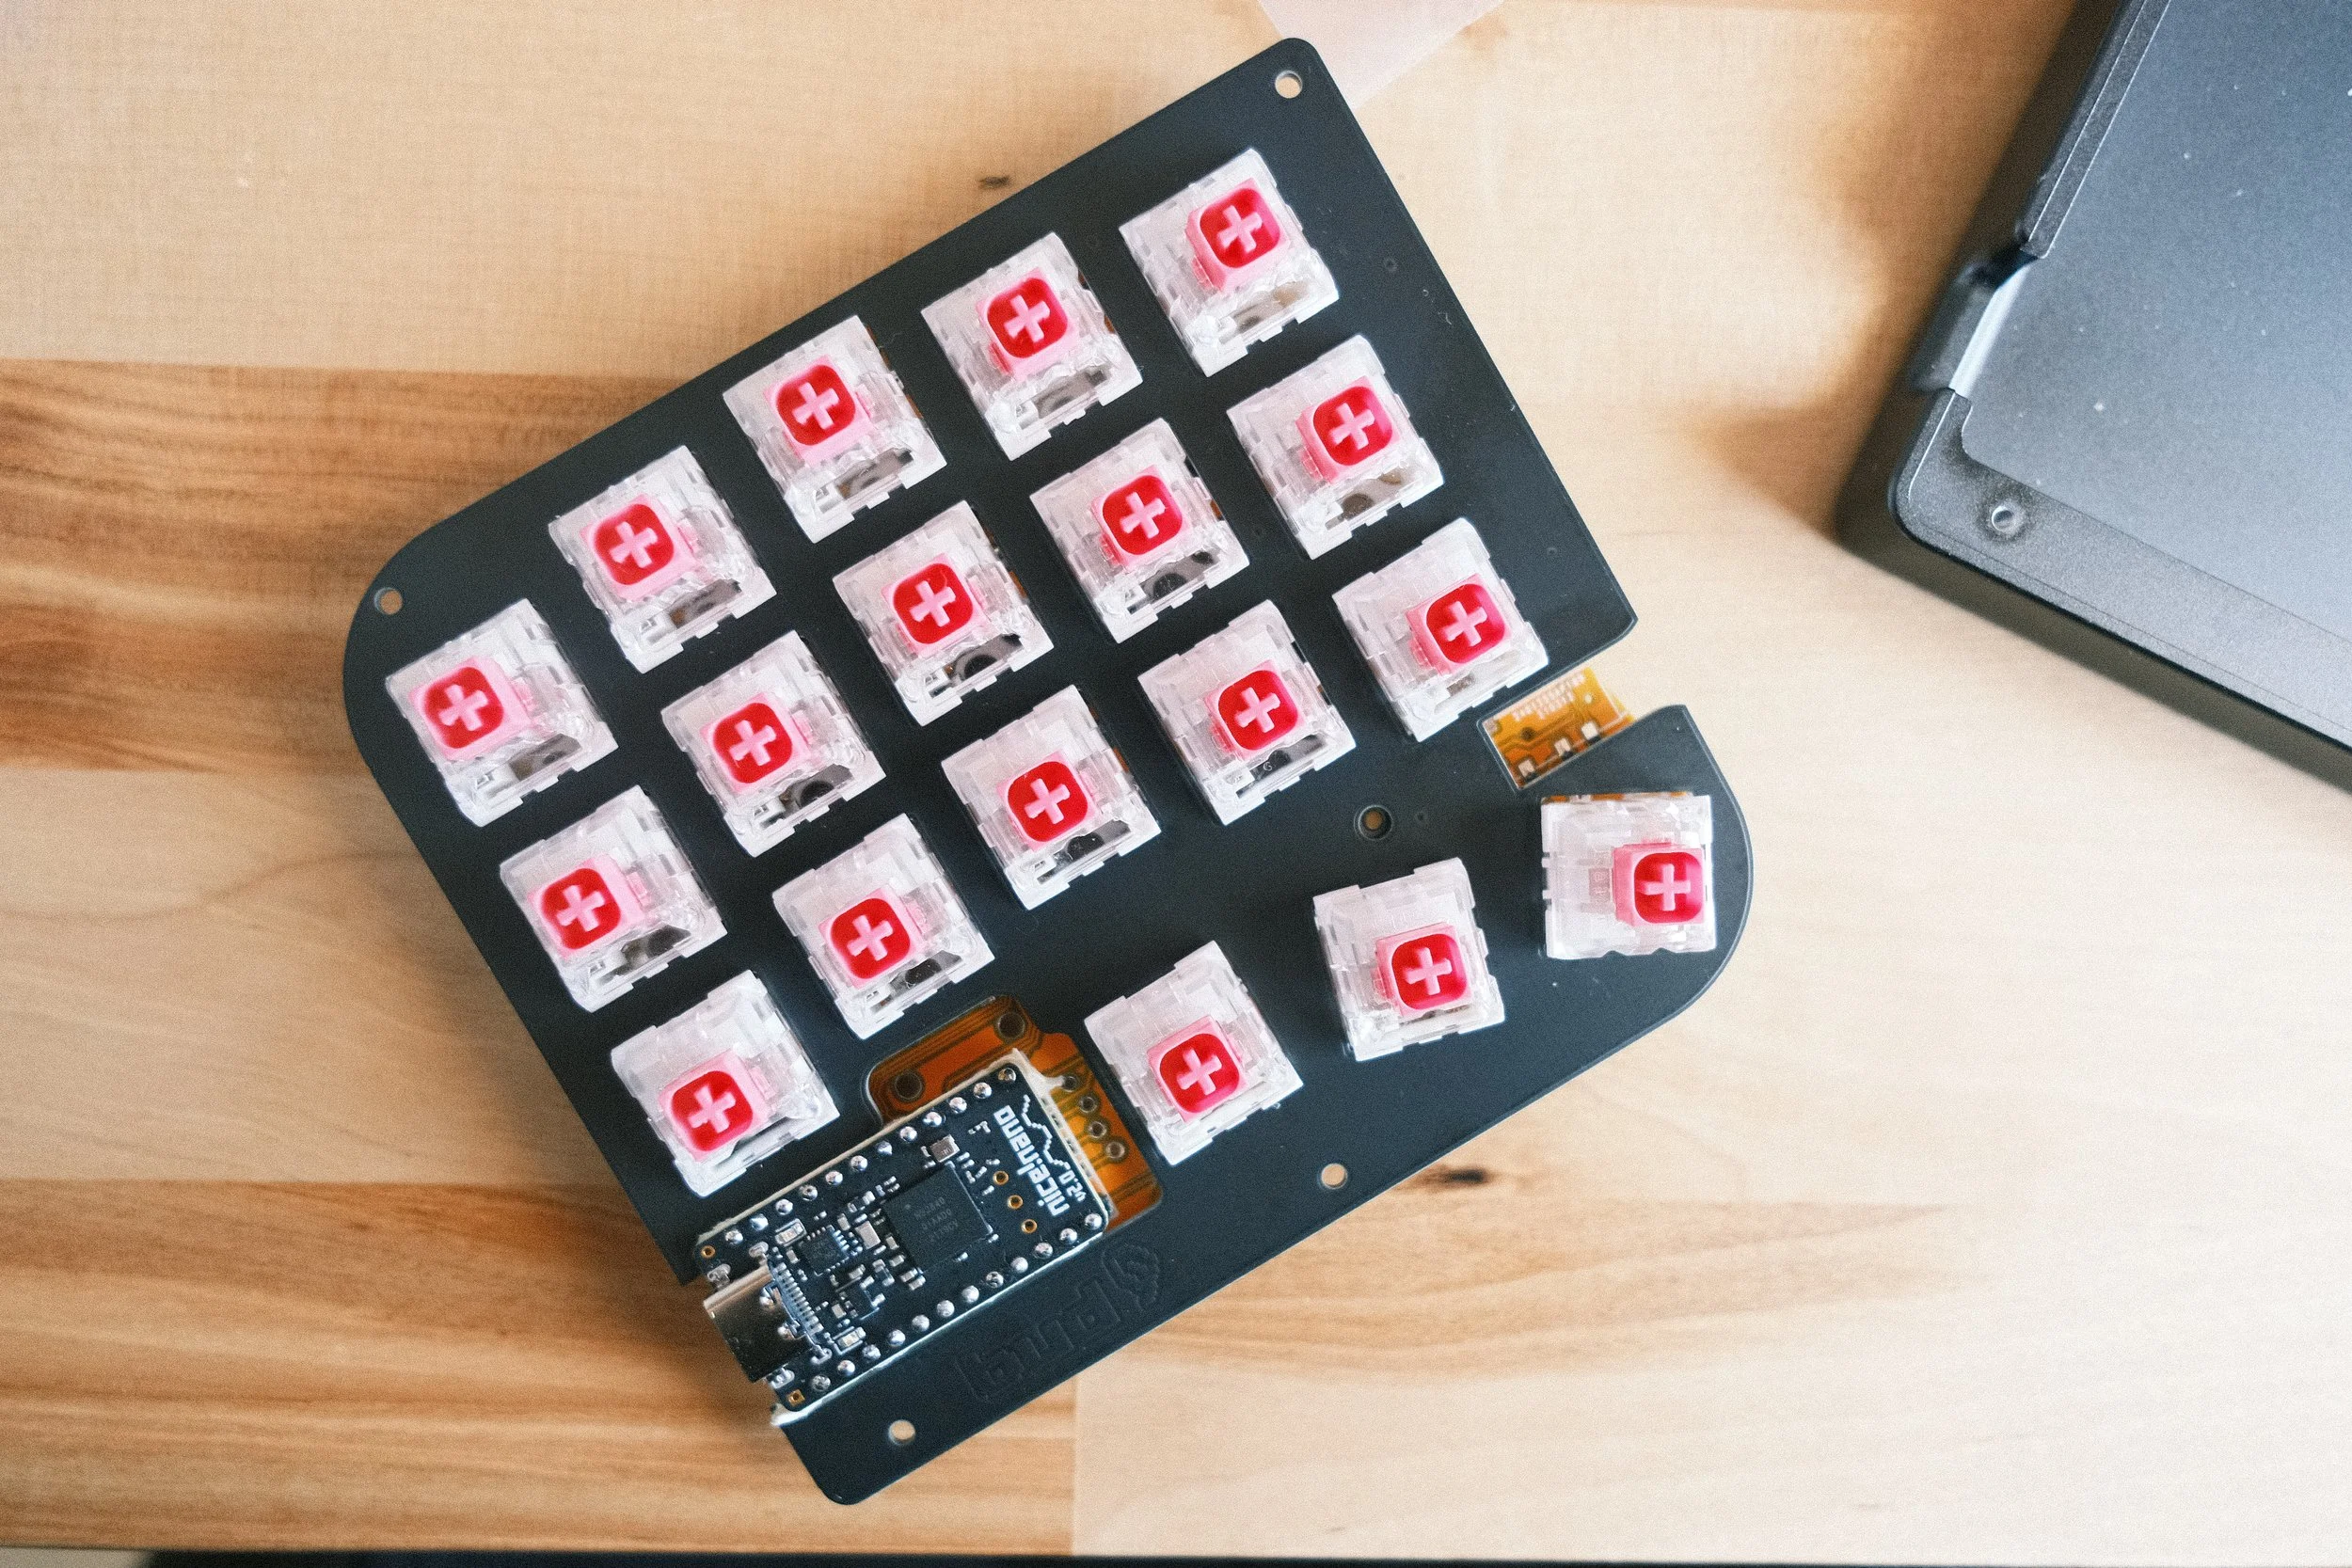
After everything was connected, getting the switches in the board was straightforward.
While the process itself was straightforward, a lot of things went wrong due to my lack of experience. Entire rows would stop working randomly, which I eventually realized was poor soldering of the microcontroller connections. The battery on one side completely disconnected when I assembled it because of my poor soldering. Lots of the hot swap sockets popped out when I installed the switches, again because of poor soldering. Things would work for a couple of hours, and then a connection would come loose and make the whole thing completely unusable again.
Once I got to this stage, there were more problems — I have always used Oryx or QMK to create keymaps with their GUI, and never mapped these myself. I created a Github repo for my board, and proceeded to make many changes that would fail in the build until I got what I wanted. Then, after a few minutes of testing, I would realize I actually wanted different behavior and then try to get it working all over again. The lack of keys made figuring out a workable keymap all the more challenging, although I think I have finally arrived at a working solution using some “hold-tap” keys, which means they act as one key when they’re tapped and another when they’re held. For example, my “z” and “?” keys also serve as a SHIFT key when they’re held.
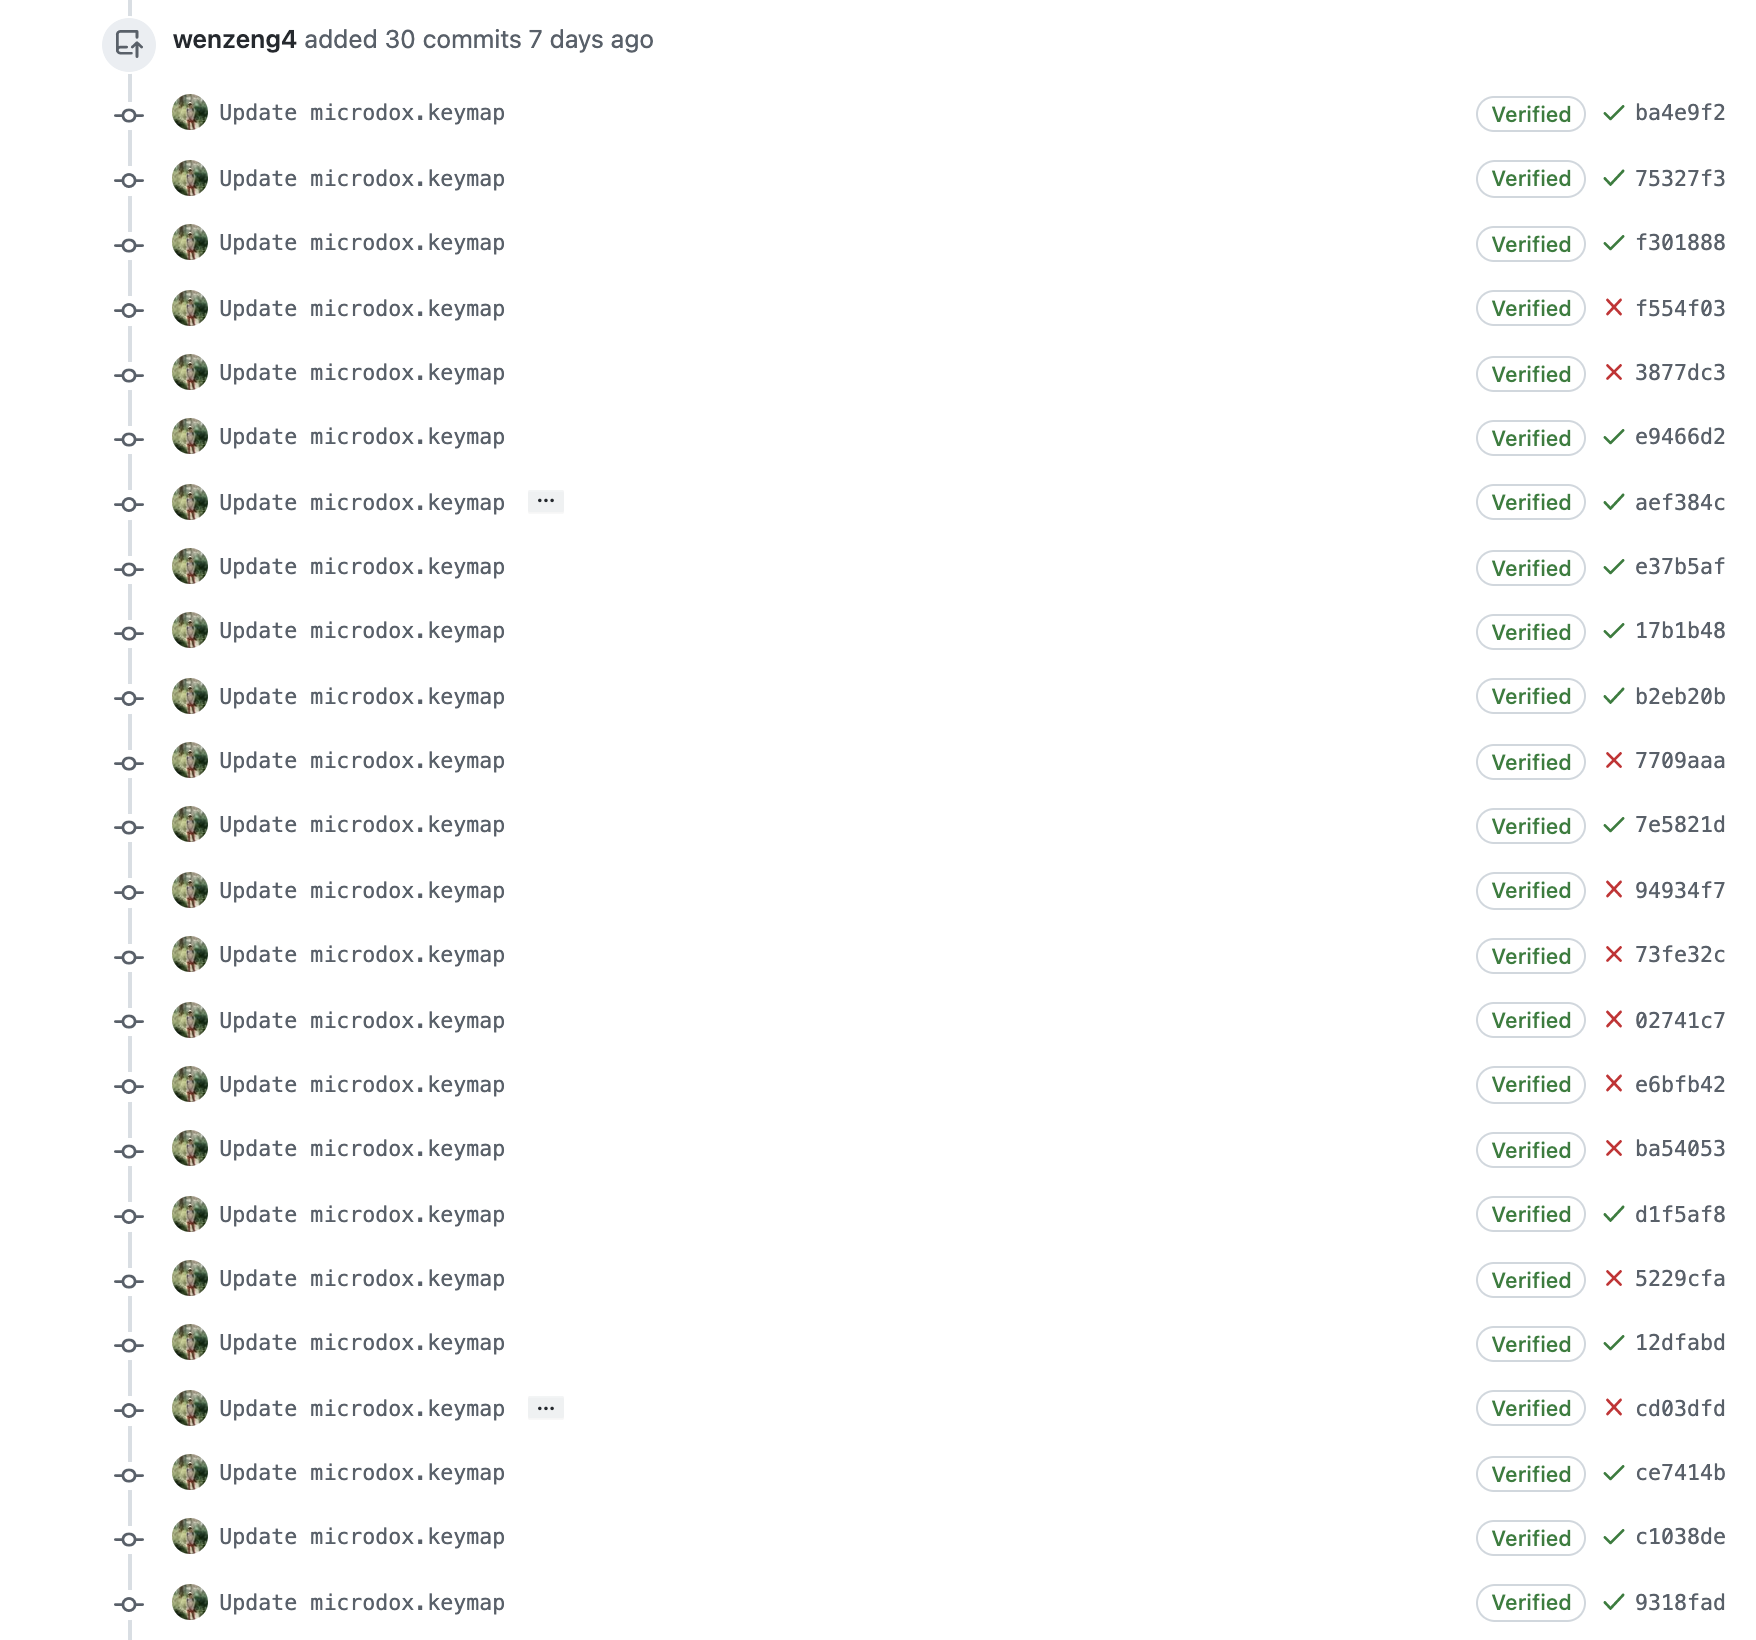
So many commits to get to a functional keymap.
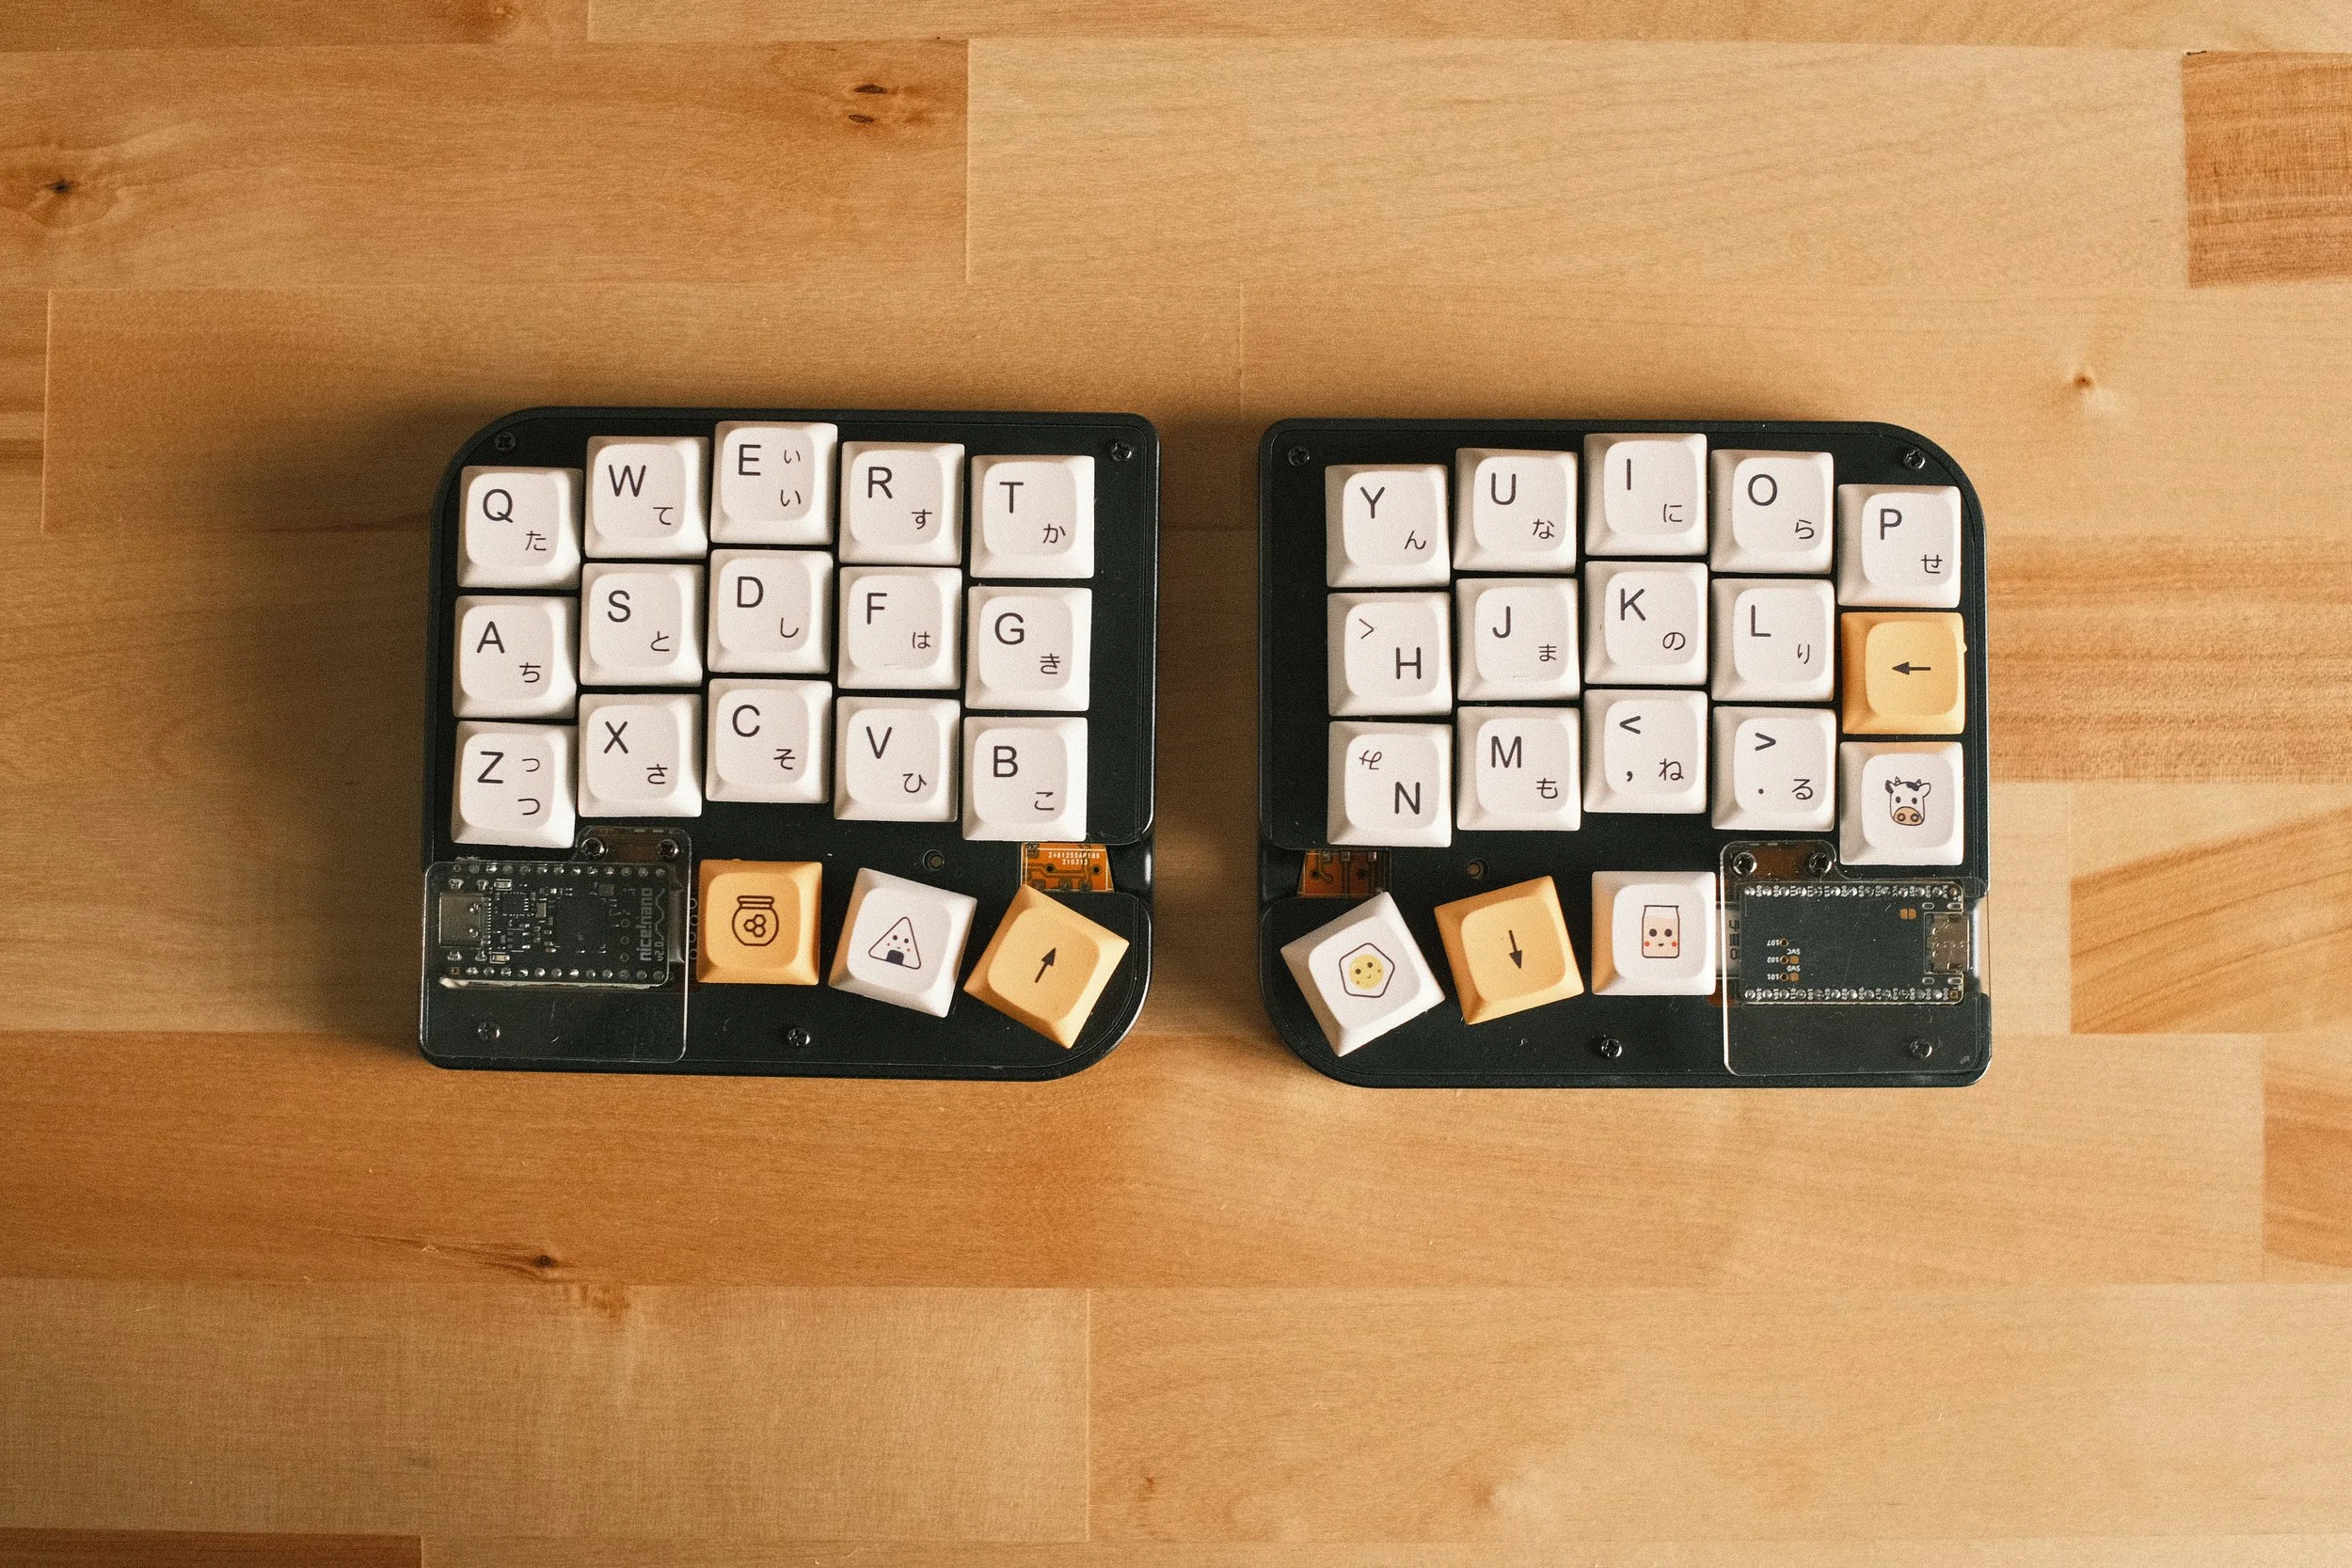
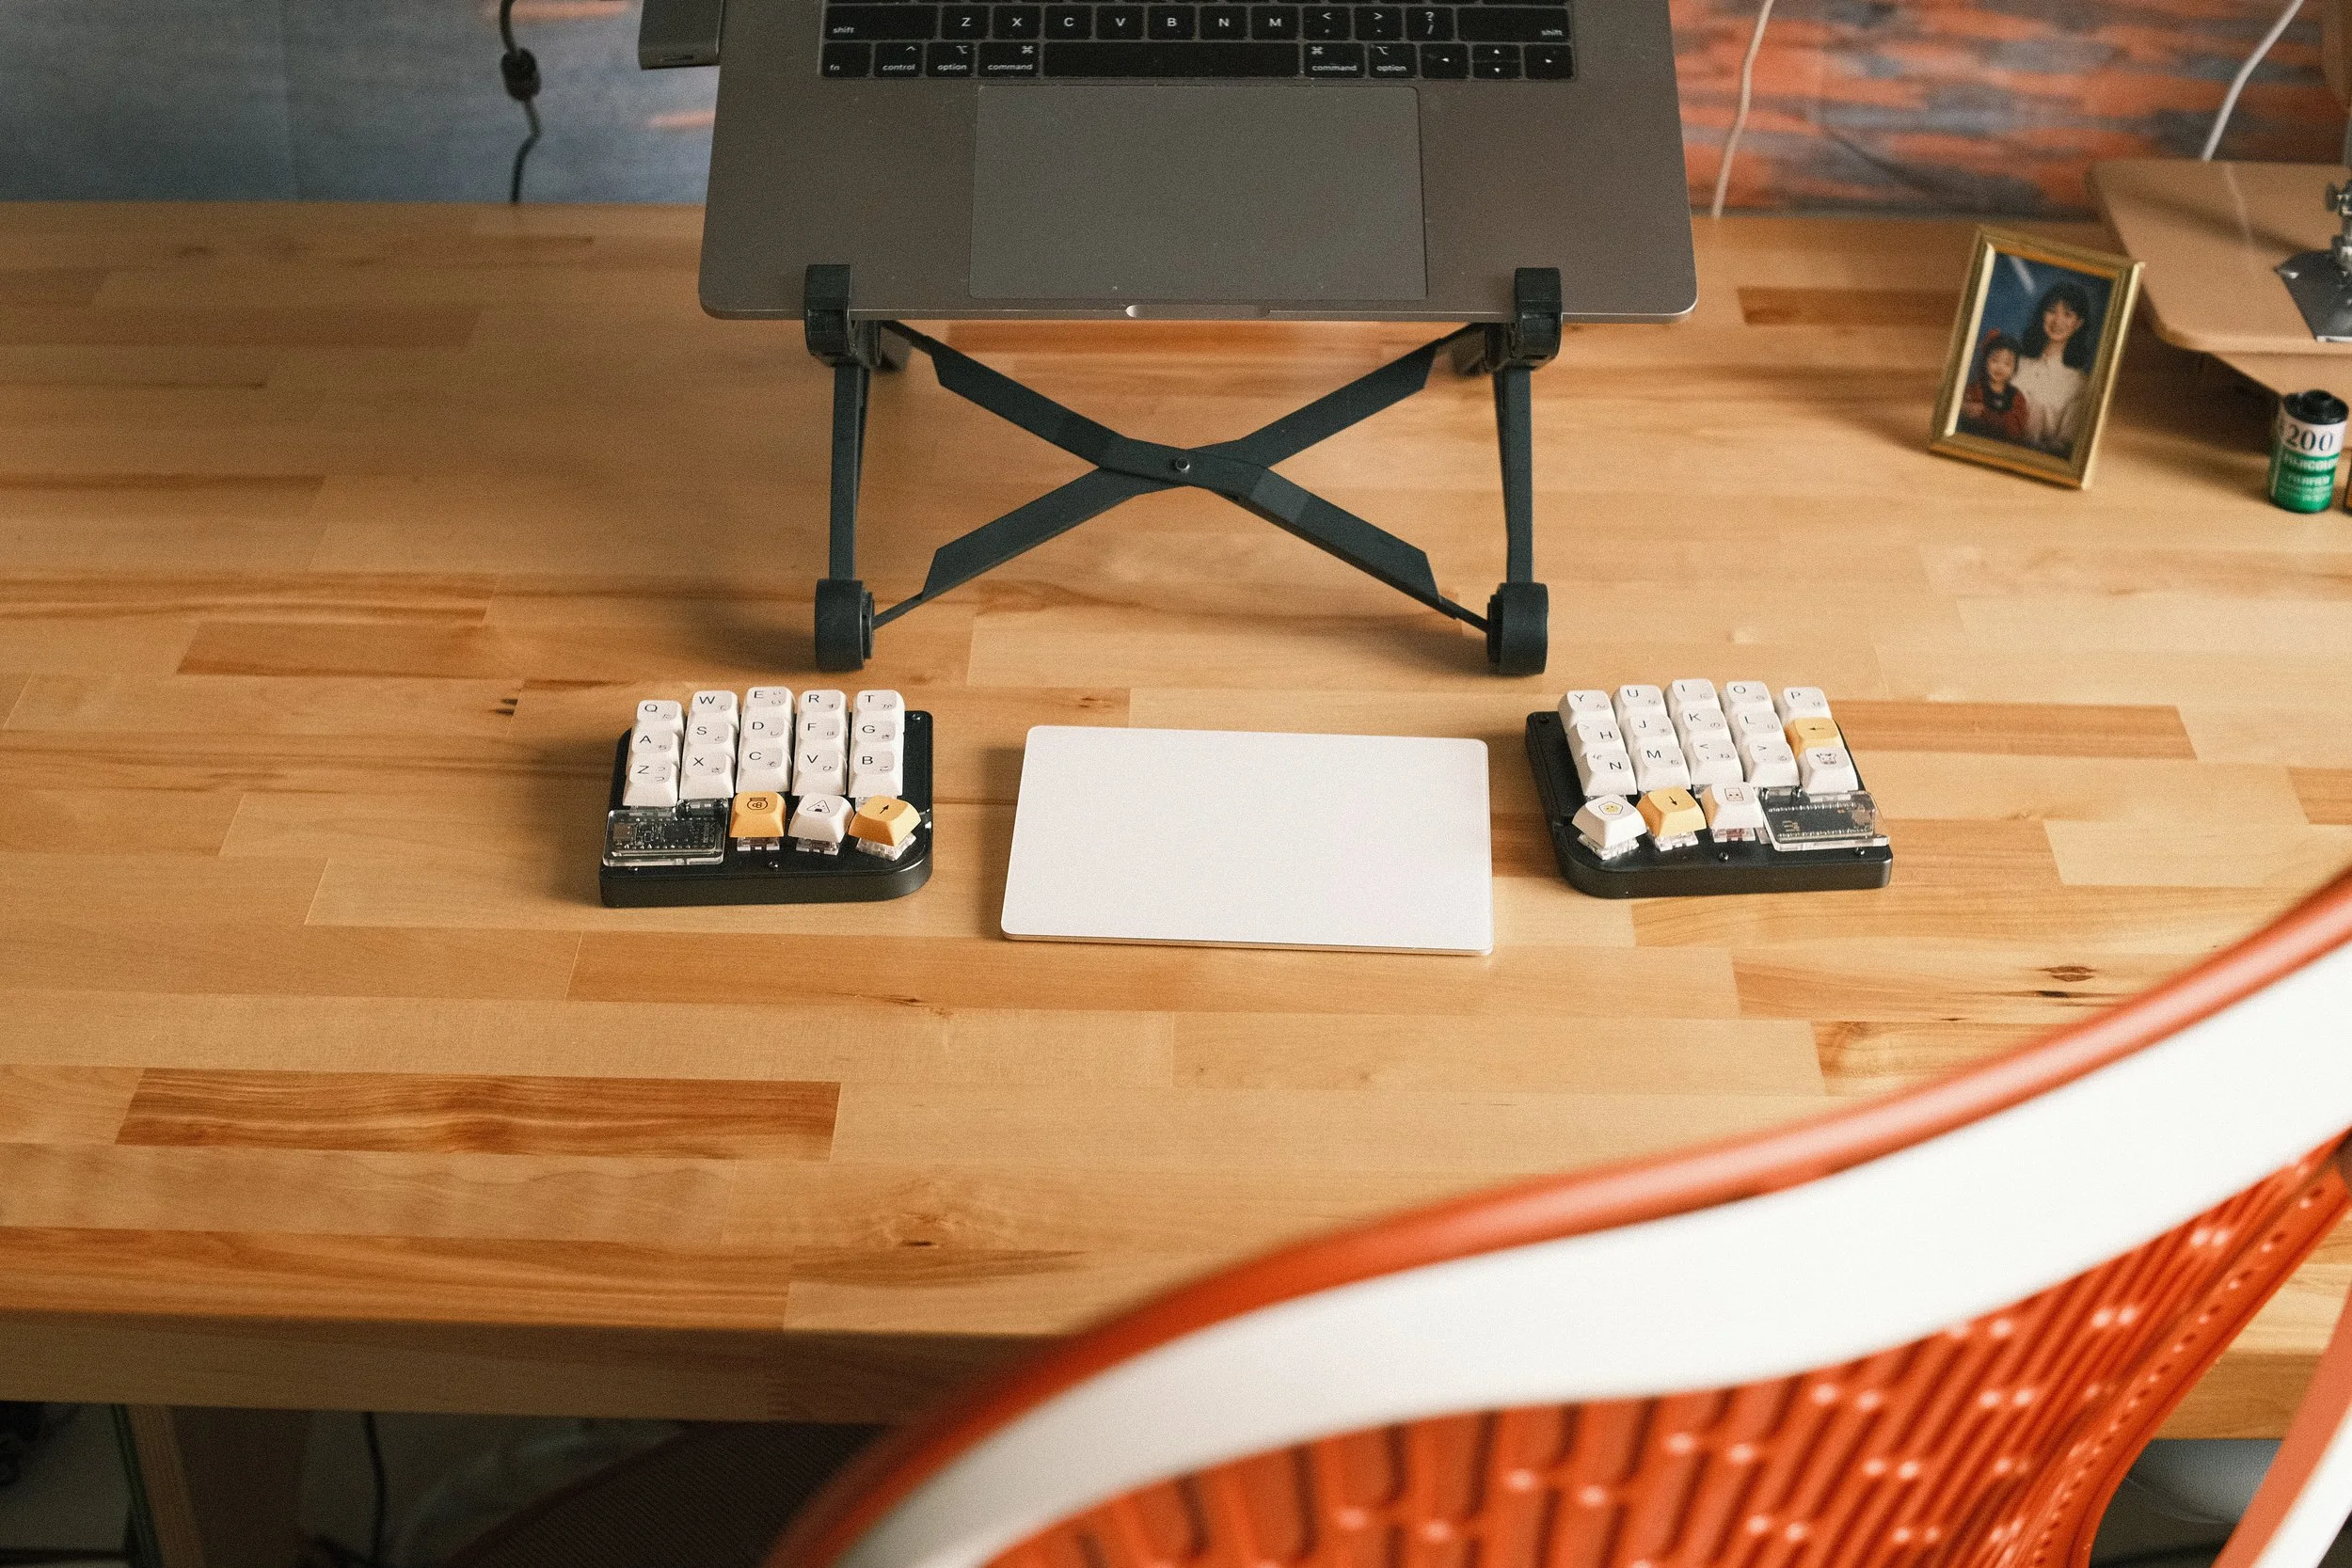
It is definitely more comfortable than my previous non-split keyboard. Having my trackpad between the two halves makes it really easy to work. The left side, which is the side directly connected to the computer, works pretty flawlessly most of the time. I have been experiencing period lag on the right half and it will sometimes disconnect, and I have no idea. I’m still searching to see if there is a workable solution around that. It’s not annoying enough at the moment that I won’t use the board, but it is frustrating when I’m trying to type out long paragraphs and it cuts out. Regardless, I learned a ton about how to solder properly, how to modify keyboard keymaps, and how to be a little bit more patient when working on systems with so many different factors that can go wrong.
About 3 days into trying out this new layout, I can comfortably type 110 WPM if the right half doesn’t freak out. That’s pretty solid for any normal work, and the 30% layout is really comfortable on the hand after my brain figures out how to remember how to get it to type what I want. While it’s not perfect, I did have a lot of type 2 fun on this project. I can’t say that I want to do it again, but I did learn many lessons that would make this much easier the next time around. In the future, I would probably eat the aesthetic cost and just use a wired setup. It’s more reliable.